Machine Learning from the Browser
First thing’s first. Why would I want to have my code in the cloud? Well, the normal (ideal?) Is that we have a local development environment on our own computer, a test environment on a server, staging and production. But … what happens if we don’t have the environment installed yet? Or we have conflicts with a file / library, Python version … or whatever it is, we don’t have disk space … or even if it goes very slow and we don’t have – the short term- higher processor / ram? Or even for simple convenience, it is always good to have an online website at hand, « always ready » where practically all the software we need is installed. And that service is provided by Google, among other options. The interesting thing is that Google Colab offers several advantages over its competitors.
interesting is that Google Colab offers several advantages over its competitors.
The GPU…. At home or in the cloud?
A GPU? Why do I want that if I already have like 8 cores? The reality is that for the processing of Machine Learning algorithms (and for video games, ahem!) The GPU is much more powerful in performing calculations (also in parallel) for example matrix multiplications … those that WE DO TOooooDO the time when TRAINING our models !!! to make the descent by gradient or All the time with the Backpropagation of our neural networks … This represents an improvement of up to 10x in processing speed … Algorithms that previously took days and now are solved in hours. A huge advance.
If you have an Nvidia card with a GPU already installed, congratulations you have the power! If you do not have it and you are not going to invest a few dollars to buy it, you can have all (*) its power from the cloud!
(*) NOTE: Google reserves the power to limit the use of the GPU if it considers that you are abusing or using that resource excessively or for improper purposes (eg bitcoin mining)
What is Google Colab?
Google Colab is a cloud service that provides us with a Jupyter Notebook that we can access with a web browser regardless of whether we use Windows, Linux or Mac “at home”. It has great advantages
- Possibility of activating a GPU
- We can share the code easily
- It is based on jupyter notebook and it will be a familiar environment
- We can create books in Python 2 or 3
- It has pre-installed the common libraries used in datascience and the possibility of installing others that we need
- By linking to our Google Drive account, we can read input csv files from there or save output images, etc.
How is GoogleColab used?
First of all, we enter and log in with our Google account at Colaboratory. Now we can:
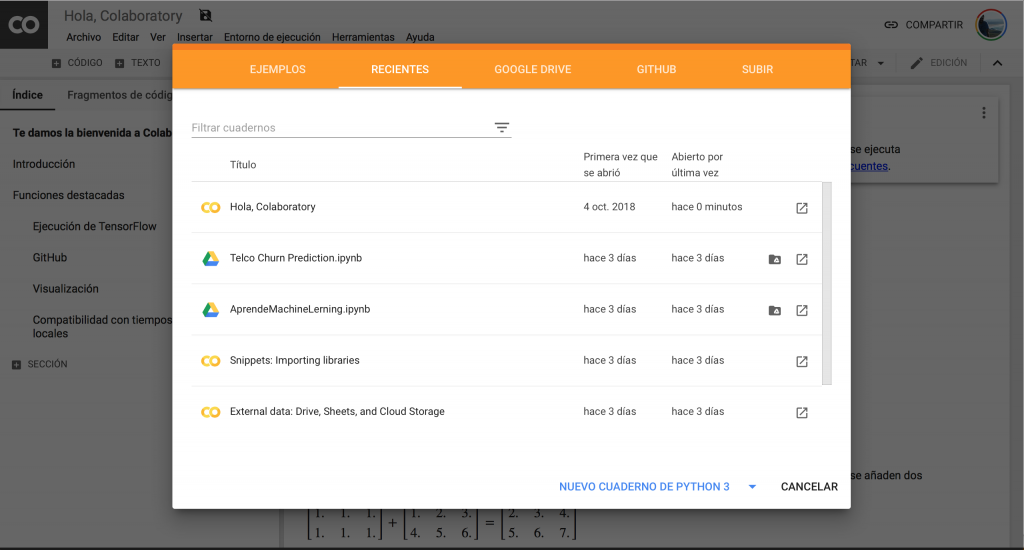
- Create a new notebook:
- Let’s go to « File -> create new notebook in Python 3 »
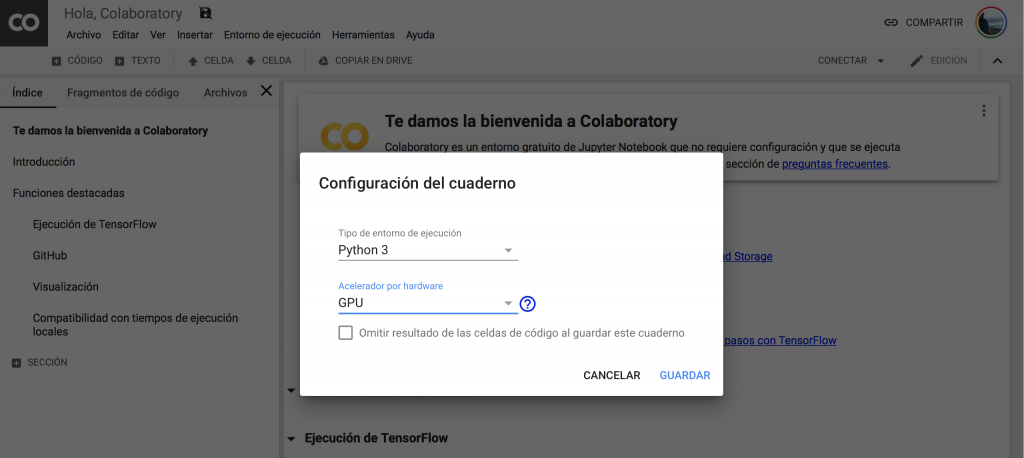
- and enable GPU:
- We go to « Execution Environment -> Change type of execution environment » and choose « Hardware Accelerator » GPU
Link with Google Drive
An advantage of linking our account with Drive is because it makes it easier for us to upload or download files. To upload a file we select « Files » from the left panel and click the « upload » button as shown in the image:

But if you want to be able to use any file, eg. csv that you have in your drive, you should execute in a cell:
|
1
2
|
from google.colab import drive
drive.mount(‘/content/drive/’)
|
It will ask you to click on a link and write a code that it will give you when you authorize the app. When you go back and do update in the files tab you will see your unit mounted and ready to use !!
Run a jupyter notebook from Github
We are going to open a Jupyter Notebook that contains the exercise explained in the Convolutional Neural Networks article : Classify 70,000 sports images . To do this, in the « Open notebook » box:

- we select GITHUB,
- copy the repository address, in our case https://github.com/….
- and we give the magnifying glass to search.
- The list with the repo files will appear.
- And from there we select the notebook
We will see that we have the same Notebook but in Google Colab 
Download a resource to the notebook
ALMOST ALL READY… but… .. we still have something left before we can execute . In this exercise, we need to have all 70,000 images in their respective directories.
To do this, we will first download the ZIP. We create a new cell and execute:
! wget https://github.com/users/ML/database/folder/example.zip
and we will see that our zip file appears in the list (click on « Update » if necessary)

Unzip a file in the notebook
And now we must unzip it, create a cell and execute:
! unzip -uq ‘sportimages.zip’ -d ‘.’

REMEMBER to enable the runtime environment with GPU as we saw before. Now we can now run all cells and see how fast CNN runs with GPU, compared to CPU. It goes from taking 4 minutes to just 40 seconds.
Install other Python libraries with Pip
We must execute for example :! Pip install gensim
conclusion
We have seen that we have the option of having our local development environment but also this alternative of being able to program, experiment and work in the cloud. Thanks to this service, we can have the environment ready in a few seconds and take advantage of the advantages it offers us, especially the use of GPU, which is a resource that not all of us have. I hope you liked the article, do not stop writing your comments, doubts and I also encourage you to write what Machine Learning topics interest you the most. Until next time!


